When discussing ground-mounted photovoltaic (PV) projects, many people first think of ground screw foundations or concrete foundation as the installation base.
However, many overlook a more economical and convenient foundation solution: gabion .
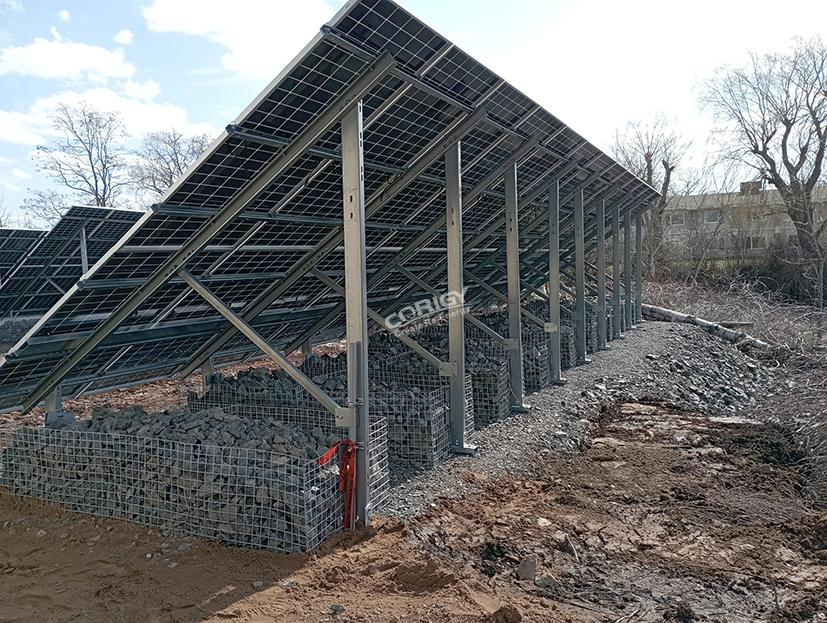
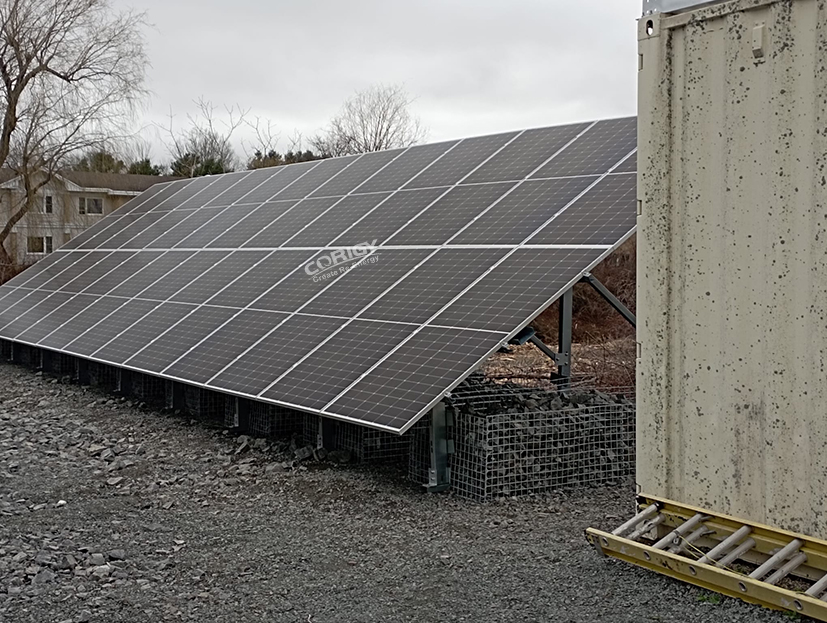
Gabion (also known as stone cage) ground-mounted PV systems use metal mesh cages filled with stones as a counterweight foundation to fix the PV supports to the ground.
This method has significant advantages in projects with special geological conditions and high environmental requirements:
1. No excavation or foundation damage required & Preserves existing terrain: Unlike traditional cast-in-place concrete pile or helical pile foundations, gabion mesh counterweights do not require large-scale excavation or damage to the soil structure, making them ideal for landfills, brownfields (contaminated land), or ecological reserves.
2. High adaptability: Can be deployed directly in rocky areas, hard ground, or areas where drilling is impossible.
3.Convenient and flexible construction & Rapid installation: Gabion mesh can be prefabricated or filled on-site, reducing the waiting time required for concrete curing and significantly shortening the construction period.
4. Mobility: If the power station needs to be relocated or the land lease expires, the gabion foundation is easy to dismantle, generating almost no construction waste.
5. Excellent Drainage and Ventilation & Performance: Prevention of Water Accumulation: The gaps between the stones have excellent permeability, unlike concrete foundations which impede rainwater penetration, effectively reducing site drainage pressure.
6. Natural Cooling: Good air circulation helps dissipate heat from the bottom of the modules, theoretically improving the power generation efficiency of photovoltaic modules in high-temperature environments.
7. Economic and Environmental Costs: Local Material Sources: If waste rock or gravel resources are available at or near the project site, material transportation costs can be significantly reduced.
8. Low Carbon Footprint: Using natural stone as ballast is more environmentally friendly than concrete, which emits large amounts of carbon dioxide during production.
9. High Stability and Durability: Wind and Slip Resistance: The large volume and weight of the gabion baskets provide excellent wind uplift resistance.
10. Structural Flexibility: Compared to rigid concrete foundations, it better adapts to minor foundation settlement or surface deformation and is less prone to cracking.